How To Draw Open AI Logo Without Tracing
Hey there! Have you ever wanted to create the Open AI logo symbol in Adobe Illustrator, but without tracing it? Well, you’re in luck, because I’m about to show you a method that will help you do just that. By following this step-by-step guide, you’ll be able to draw the Open AI circle logo symbol precisely, without tracing it from the original logo. Whether you’re a graphic designer, an illustrator, or just someone who loves creating vector graphics, this is definitely a skill worth learning. So, grab your favorite beverage, fire up Adobe Illustrator, and let’s get started!
Preparation
To create the Open AI logo symbol in Adobe Illustrator without tracing it, you’ll need the following tools and materials:
- Adobe Illustrator CS6 or later version
- A computer or laptop
- Basic skills in AI drawing, such as using the Ellipse Tool and the Rectangle Tool
- Time and patience to follow the step-by-step guide
Step-by-Step Guide
Now it’s time to create the Open AI logo symbol in Adobe Illustrator without tracing it. Don’t worry, we’ll guide you through each step so it’s easy to follow along. Just make sure you have Adobe Illustrator CS6 or later version and basic AI drawing skills before starting.
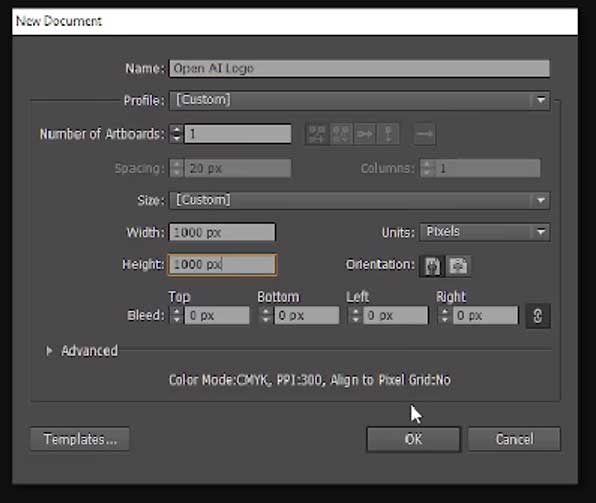
- Create New Document
Create a new document with an artboard size of 1000x1000px. This is the canvas where we’ll create the Open AI logo symbol.
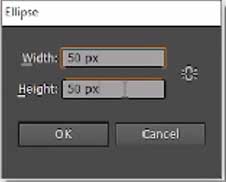
- Create Rotating Axis Point
Using the Ellipse Tool, create a circle with a size of 50x50px. This circle will be used as the rotating axis point later on.
- Create Hexagonal Shape
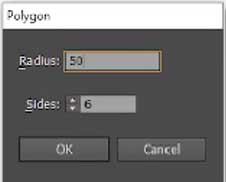
Using the Polygon Tool, create a hexagonal shape with a radius of 50px. Rotate the hexagon to a vertical position (with vertical parallel left and right sides) and align it to the center of the circle from Step 2.
- Create Two More Hexagonal Shapes
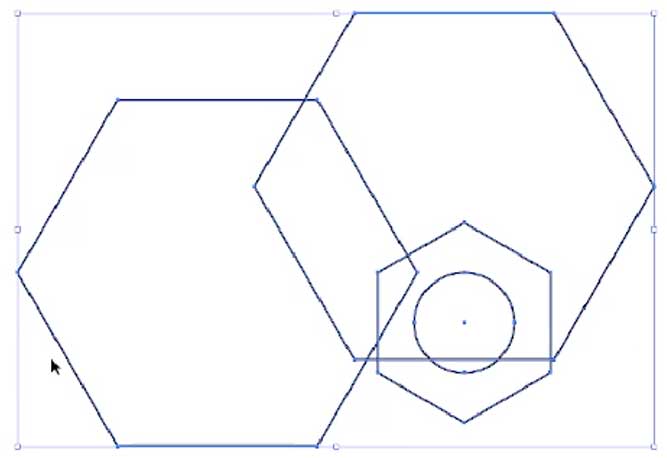
Create two more hexagonal shapes with a size of 100px. Rotate them vertically similar to Step 3.
- Place Hexagons in Formation
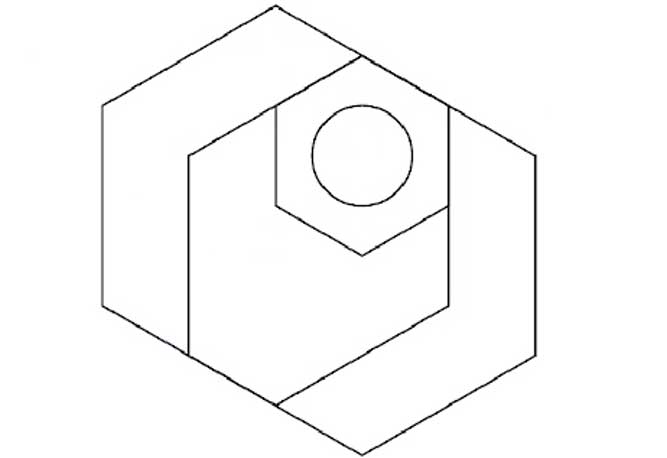
Place the two hexagons from Step 4 in this formation [image screenshot]. Use the Direct Selection Tool (shortcut: A) to meet one point to the other proper points as illustrated in the screenshot.
- Create Vertical Capsule Shape
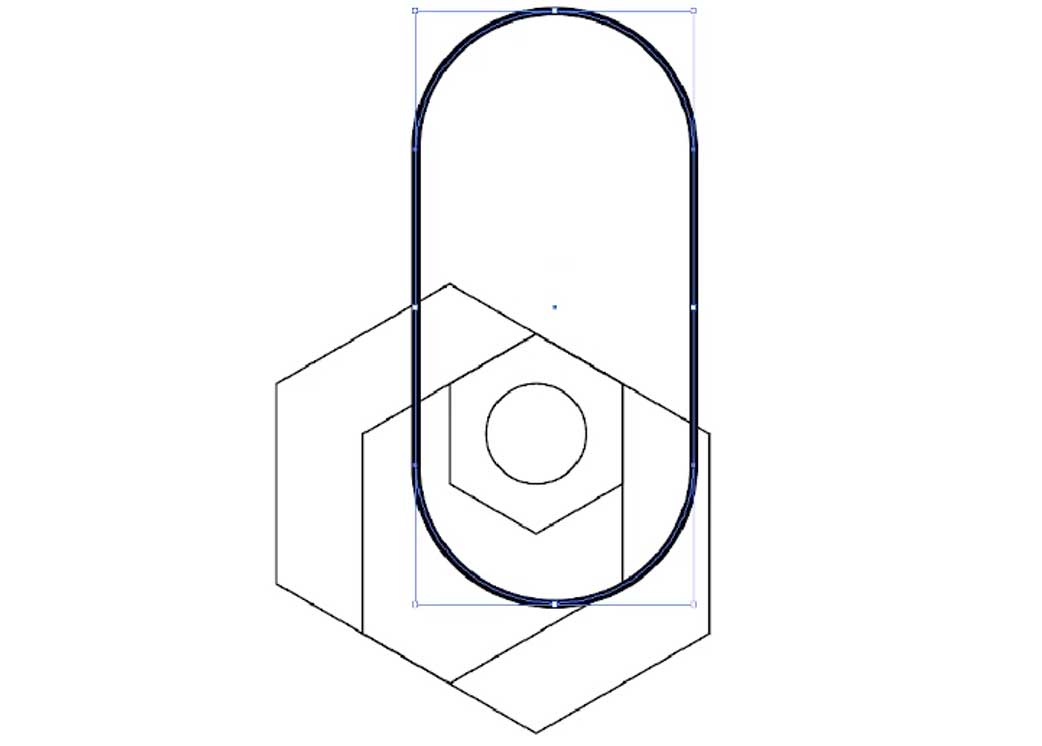
Create a vertical capsule shape using the Rounded Rectangle Tool. Change its width to 139px, and make sure to lock the aspect ratio by clicking the chain icon before changing the width to that value.
- Align Capsule with Hexagon
Align the right side of the vertical capsule with the right side of the rightmost hexagon.
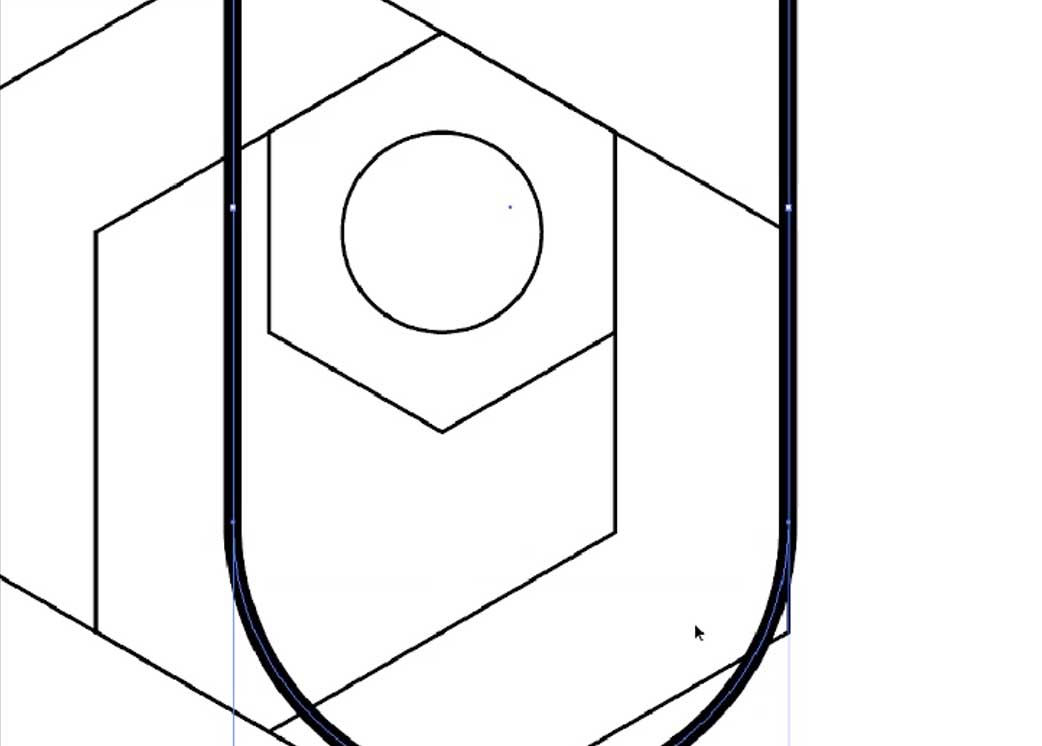
- Align Capsule with 1px Distance
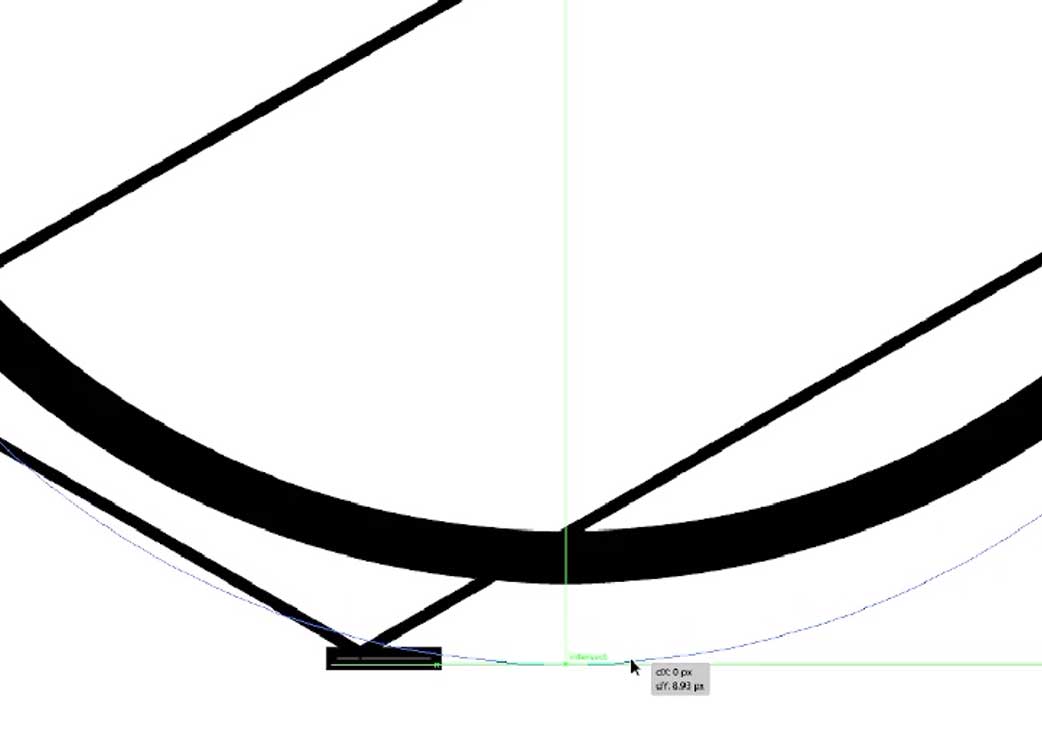
Align the bottom side of the capsule to the lowermost part of the hexagon. Then, add a 1px distance (you can use either a 1px height square for a helper or use the nudge method with 1px setting) to make the bottom of the capsule sit exactly 1px below the lowermost hexagon (see picture below).
- Add Points to Capsule and Hexagon
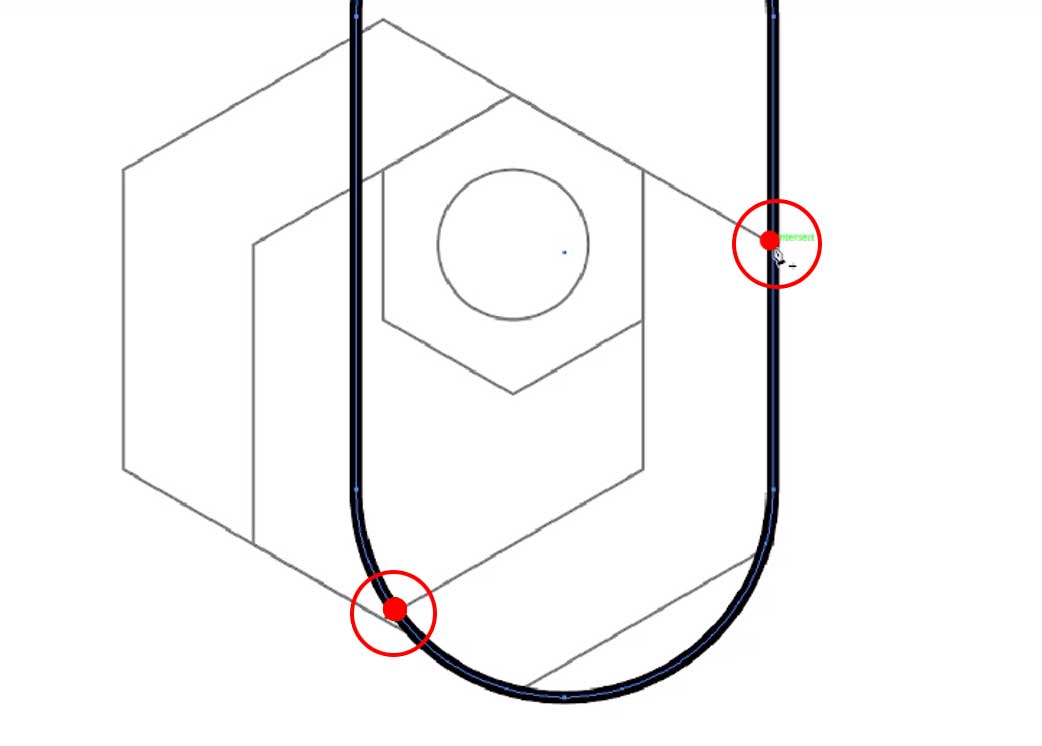
Add a point to the capsule line exactly on the intersection point of the bottom part of the top hexagon and the bottom part of the capsule (see image below). Also, add a point on the corner of the rightmost hexagonal as shown in the image below.
- Delete the Top Part of Capsule
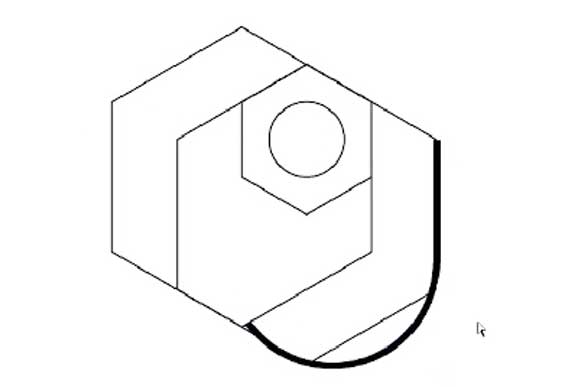
Delete the top part of the capsule based on the points we made before in Step 9, so it’s left only the right bottom line of the capsule. Set the outline width to 14px. After that, delete the top hexagon, as we don’t need it anymore.
- Delete Hexagon Lines
Delete all the hexagon lines in the remaining big hexagon, so it’s left only the top right line (see image below). Set the outline width to 15px.
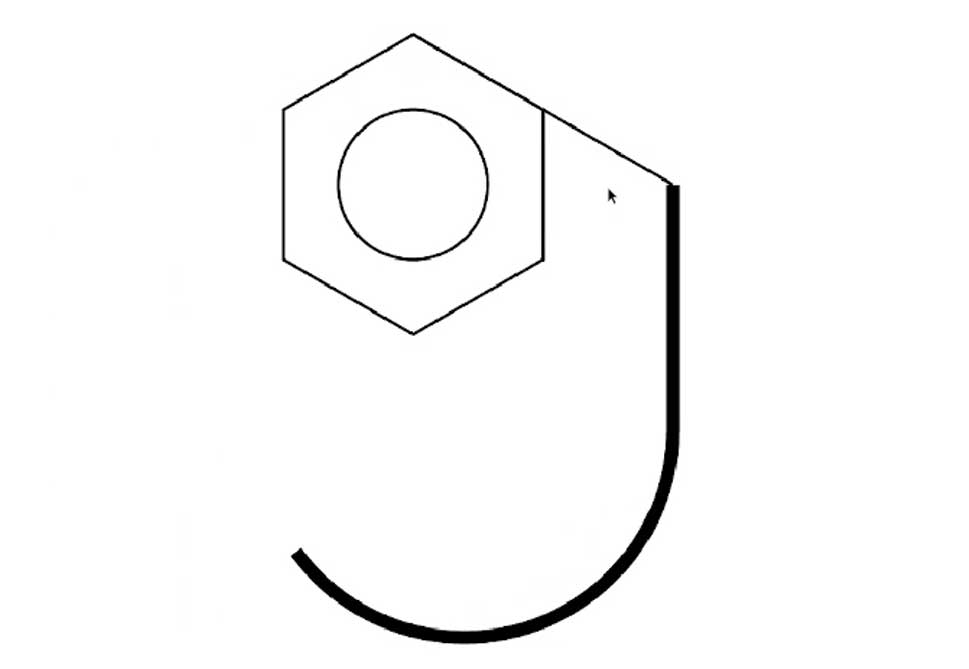
- Expand Outlines
Expand the outline in Steps 10 and 11 by going to Object > Expand, so those outlines will become shapes.
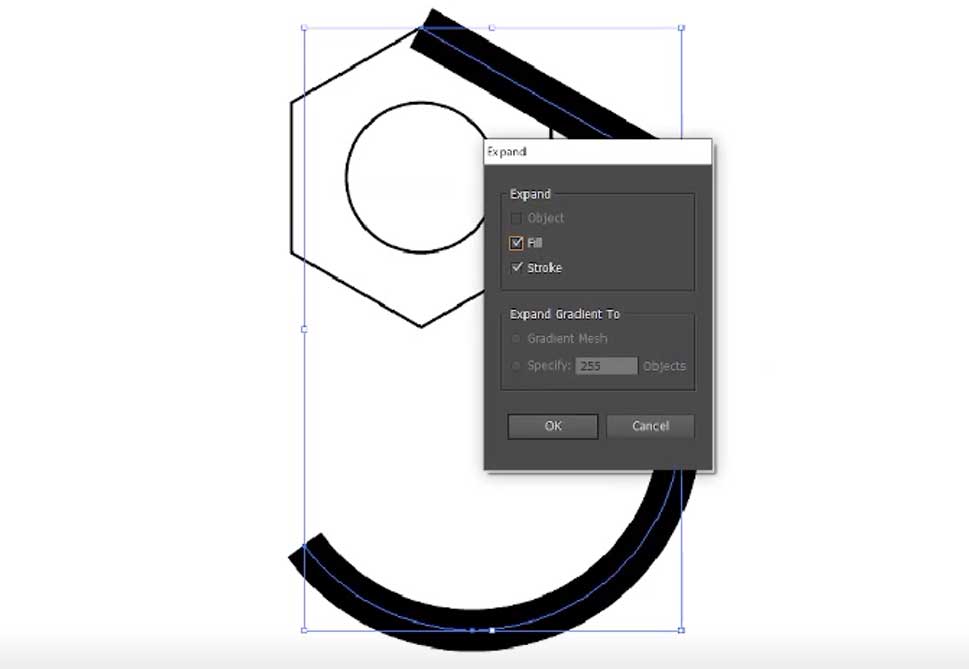
- Add Outer Shape
Select the J-like shape (line from Step 10) and add an outer shape by selecting Object > Path > Offset Path, and change the offset value to 7px.
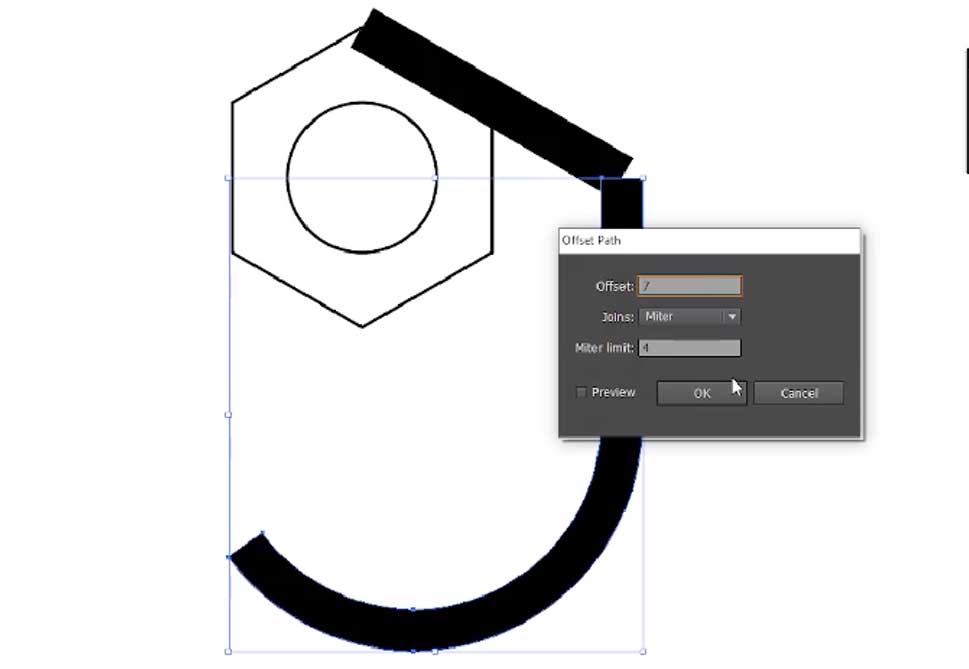
- Adjust Path and Lines
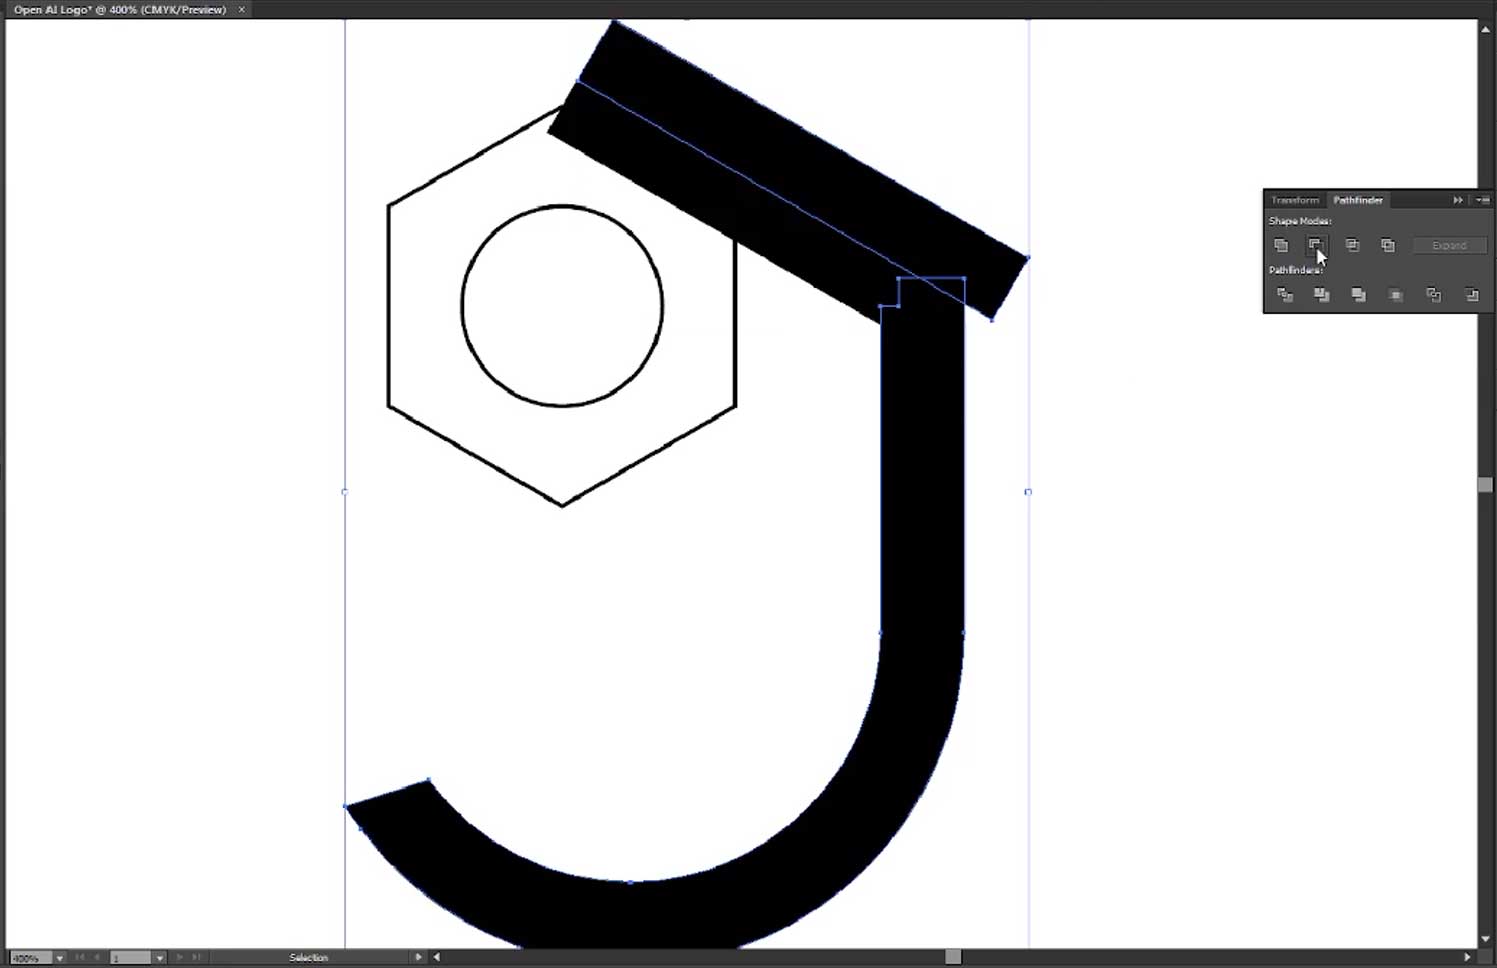
Adjust some paths and lines, and hide some paths inside so it only leaves the outside of the “J” shape. Use the Direct Selection Tool {shortcut: A} to select and adjust the points until you get the proper shape as shown below.
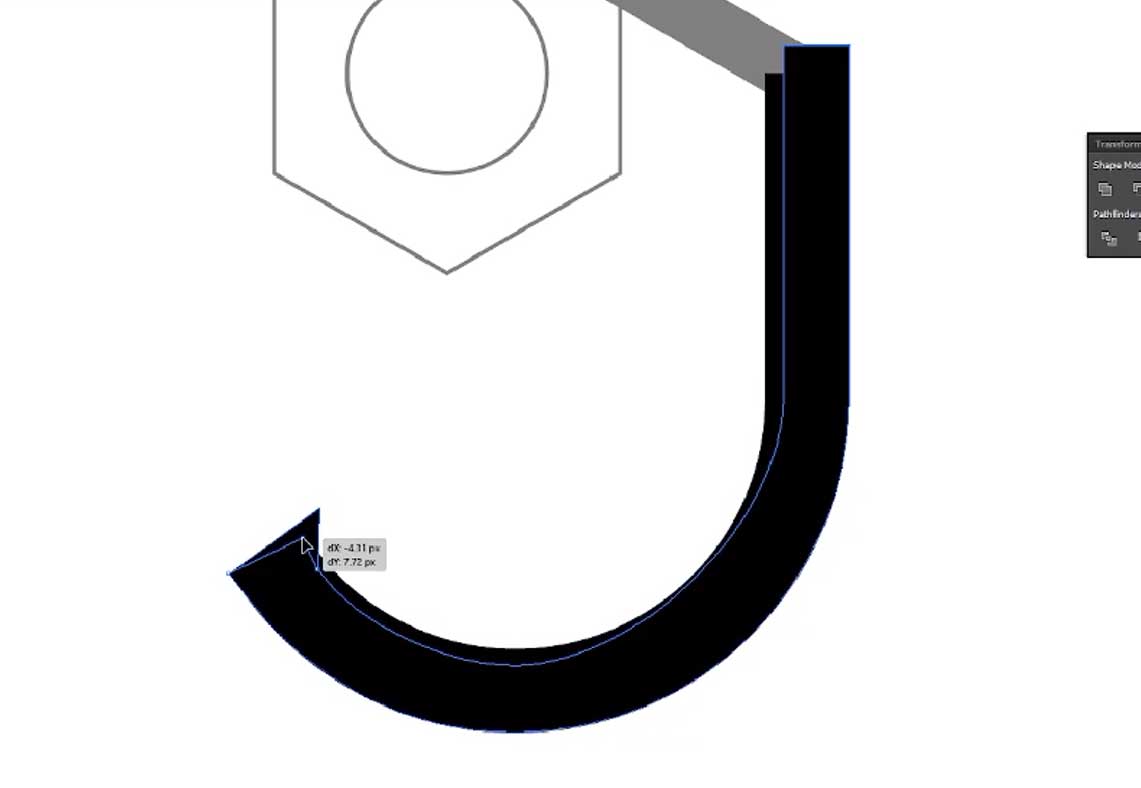
- Create Precision Corner
Create a precision corner by using a copied shape from step 11. Enlarge it, then align it parallel to its original shape by connecting the points. Make sure it is large enough to cover the corner tip of the “J” shape. Press Shift+Ctrl+] to bring this object to the front. Then select this copied shape and the offset path from step 13, and select “Minus Front” in Pathfinder. This will cut the corner tip of the “J” shape as illustrated below.
- Create Circle for Rounding Guide
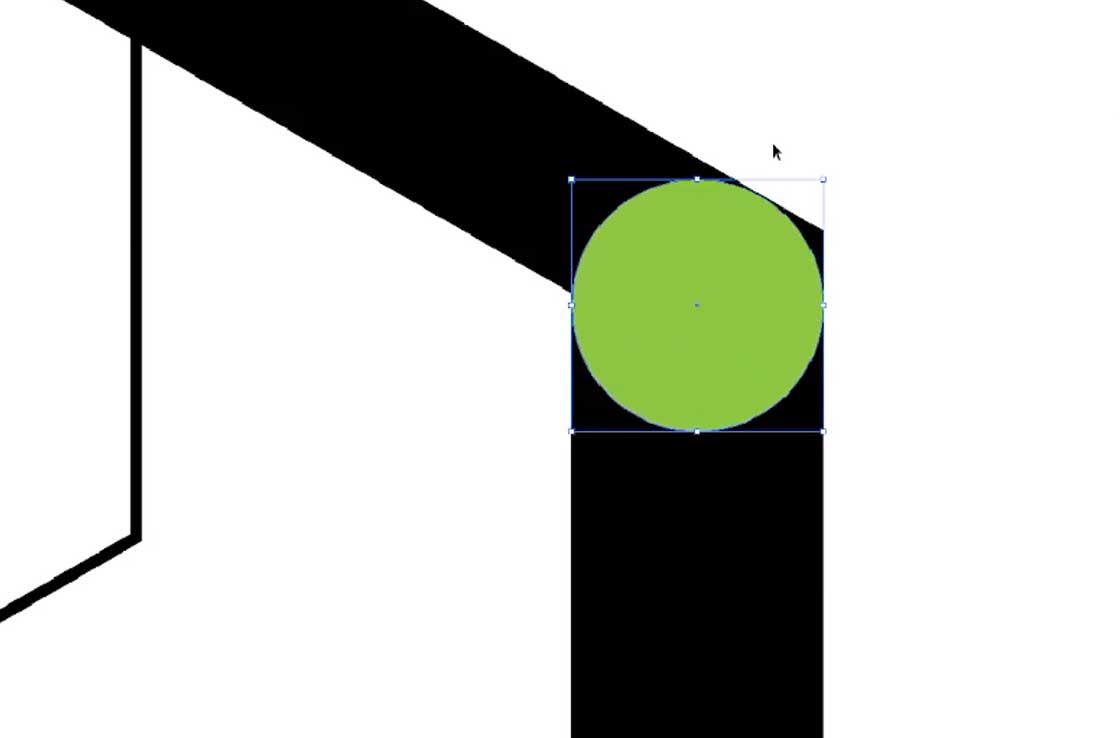
Create a circle with a width of 21x21px and place it on the corner so that each side of the shape touches the circle. This circle will serve as a rounding guide. Then use the Pen Tool to make the shape round with the circle as a guide.
- Merge All Three Shapes
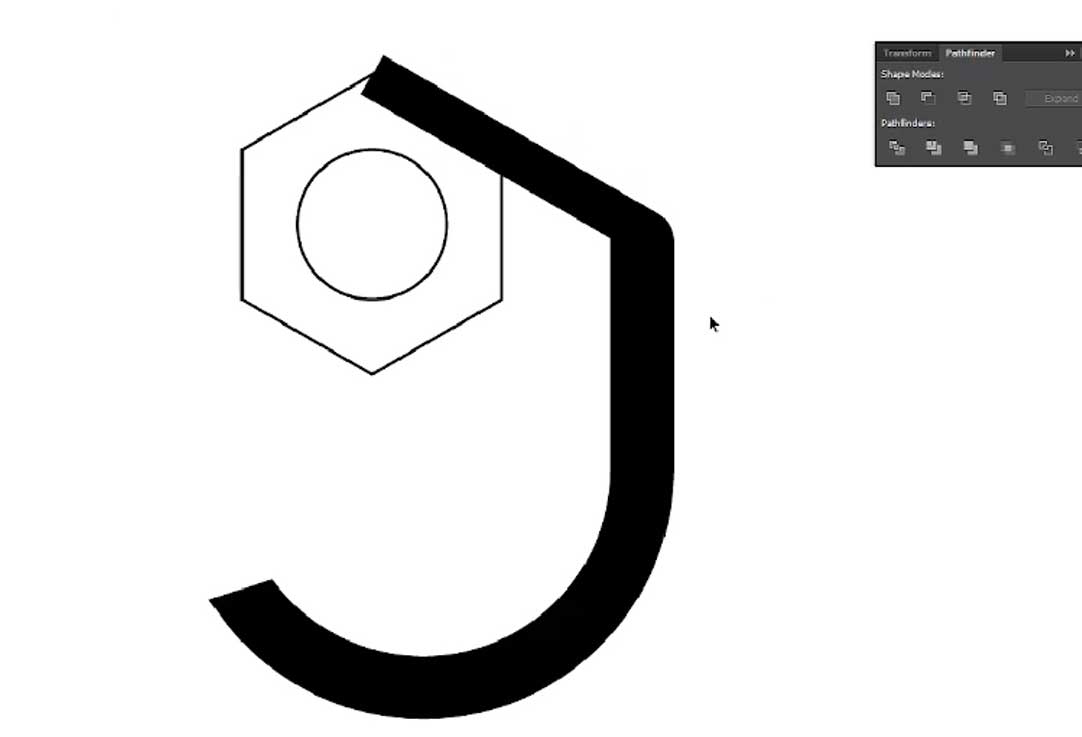
After you have finished creating the shape, merge all three shapes (two shapes from step 12 and one shape from step 13) using “Unite” in Pathfinder.
- Rotate Shape with Circle as Axis
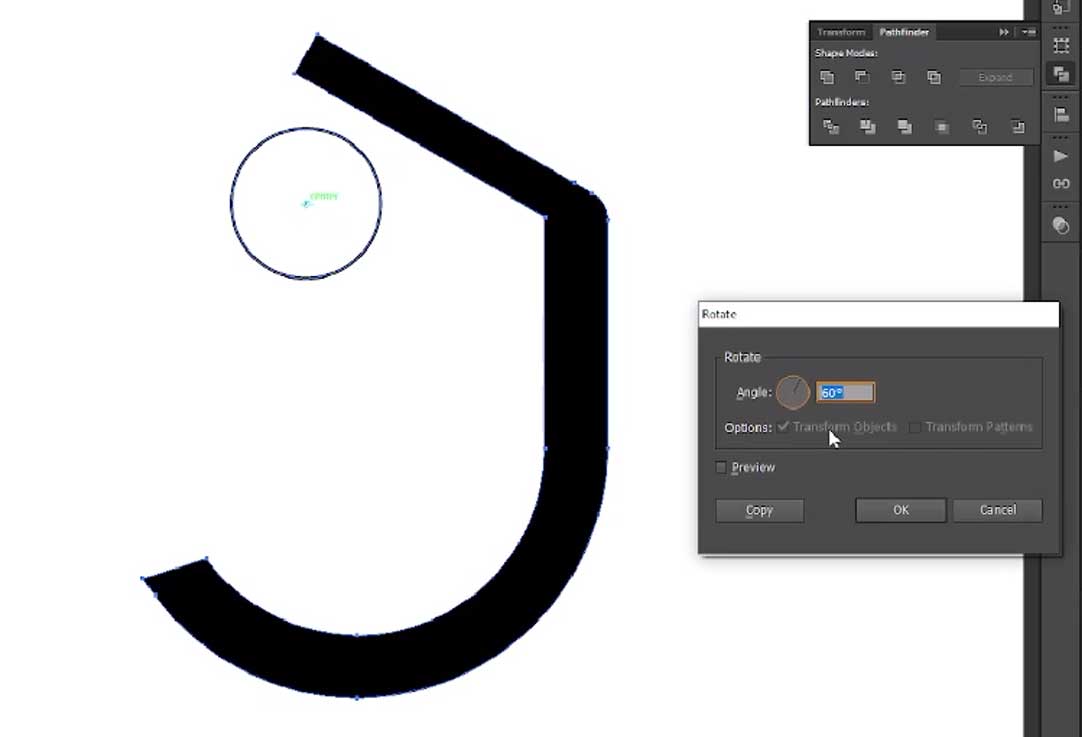
Now we just need to rotate this shape with the circle from step 2 as the rotation axis. Select the shape and press R on your keyboard. Then, alt-click on the center of the circle, set the angle value to 60 degrees, and click “Copy.” Once copied, while those copied objects are still selected, press CTRL+D on your keyboard 4 times. This will duplicate the shape and rotate it around the circle, forming the full Open AI logo.
- Add Color
Fill the shape with the ChatGPT Logo color which is #10A37F
- Finalize the Logo
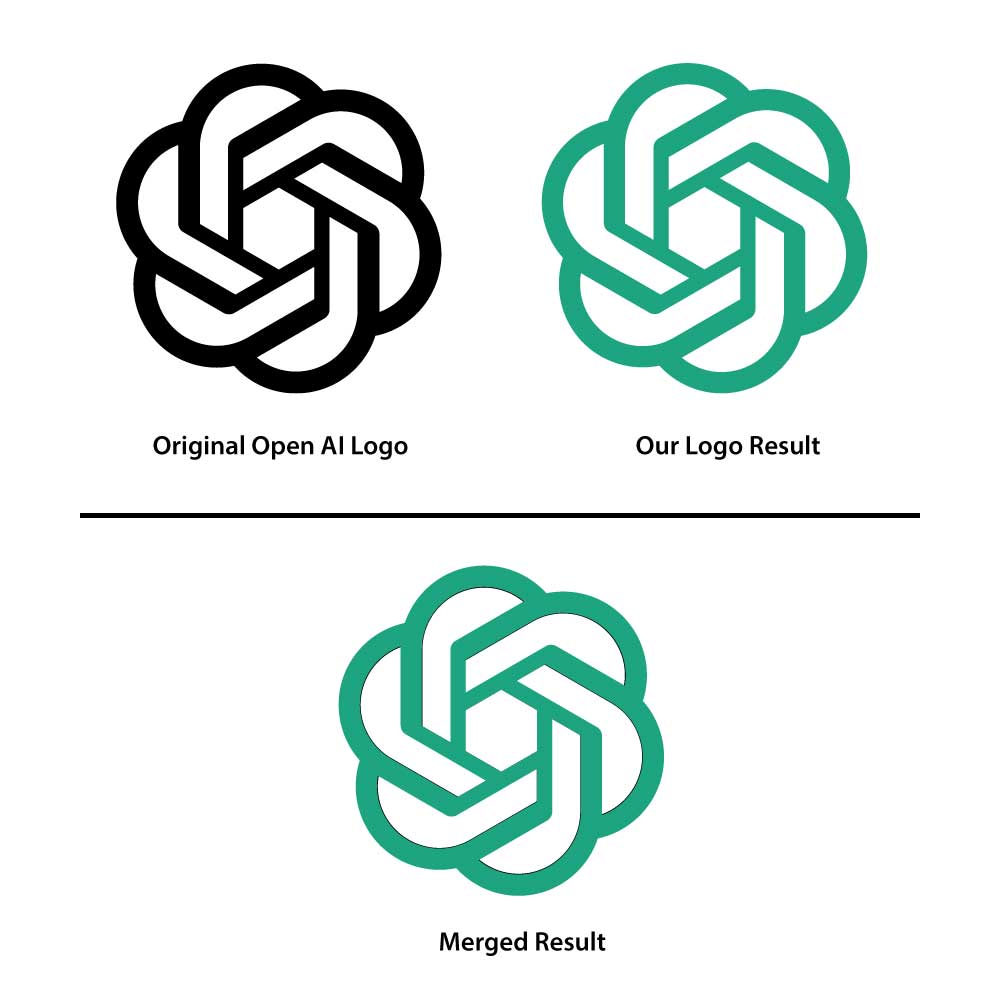
Done! Now just delete the circle, and you have your very own Open AI logo that you drew without tracing. You can compare it to the original Open AI logo to see how precisely you were able to recreate it.
Video Timelapse Tutorial
Last Words
By following these simple steps, you can create a precise Open AI logo without relying on tracing. With a little bit of Adobe Illustrator knowledge and practice, you can impress your friends and colleagues with your design skills. So why not give it a try and see what you can create? Happy designing!
However, if you are interested to make a logo design without Illustrator, check out this post! How to Make a Logo Design Vector Only with ChatGPT

